Introduction
My son (A.) and I have been going to the Carronade show in Falkirk every year since 2015 - at least, in years when the show wasn't cancelled due to Covid lockdowns and the like. It's always been a good day for me; this year was no exception. As always on my blog, this is a personal account of our experiences rather than any attempt to describe the entire event. It's mainly for my own memories, though if others find my writing entertaining then that's good too!
My preferred mode of transport to Falkirk is by train. It takes longer than driving from home (Helensburgh) once the walks to and from various stations are taken into account, but it's so much more relaxing. The exercise is also better for me! This Saturday was a beautiful day for walking - warm and dry.
The Venue
Carronade is a big show (not huge, but definitely big enough for a day out). It's held in a school building, where the show is spread over 5 different halls. One of these is reserved for the flea market (bring & buy) and another is mainly for the painting competition.
The other three halls (pictured below) are full of games and traders:
We spent time wandering around looking at the demonstration games, joining in various participation games, browsing trade stands and meeting various friends.
Also, we sampled some of the various participation games that were on offer.
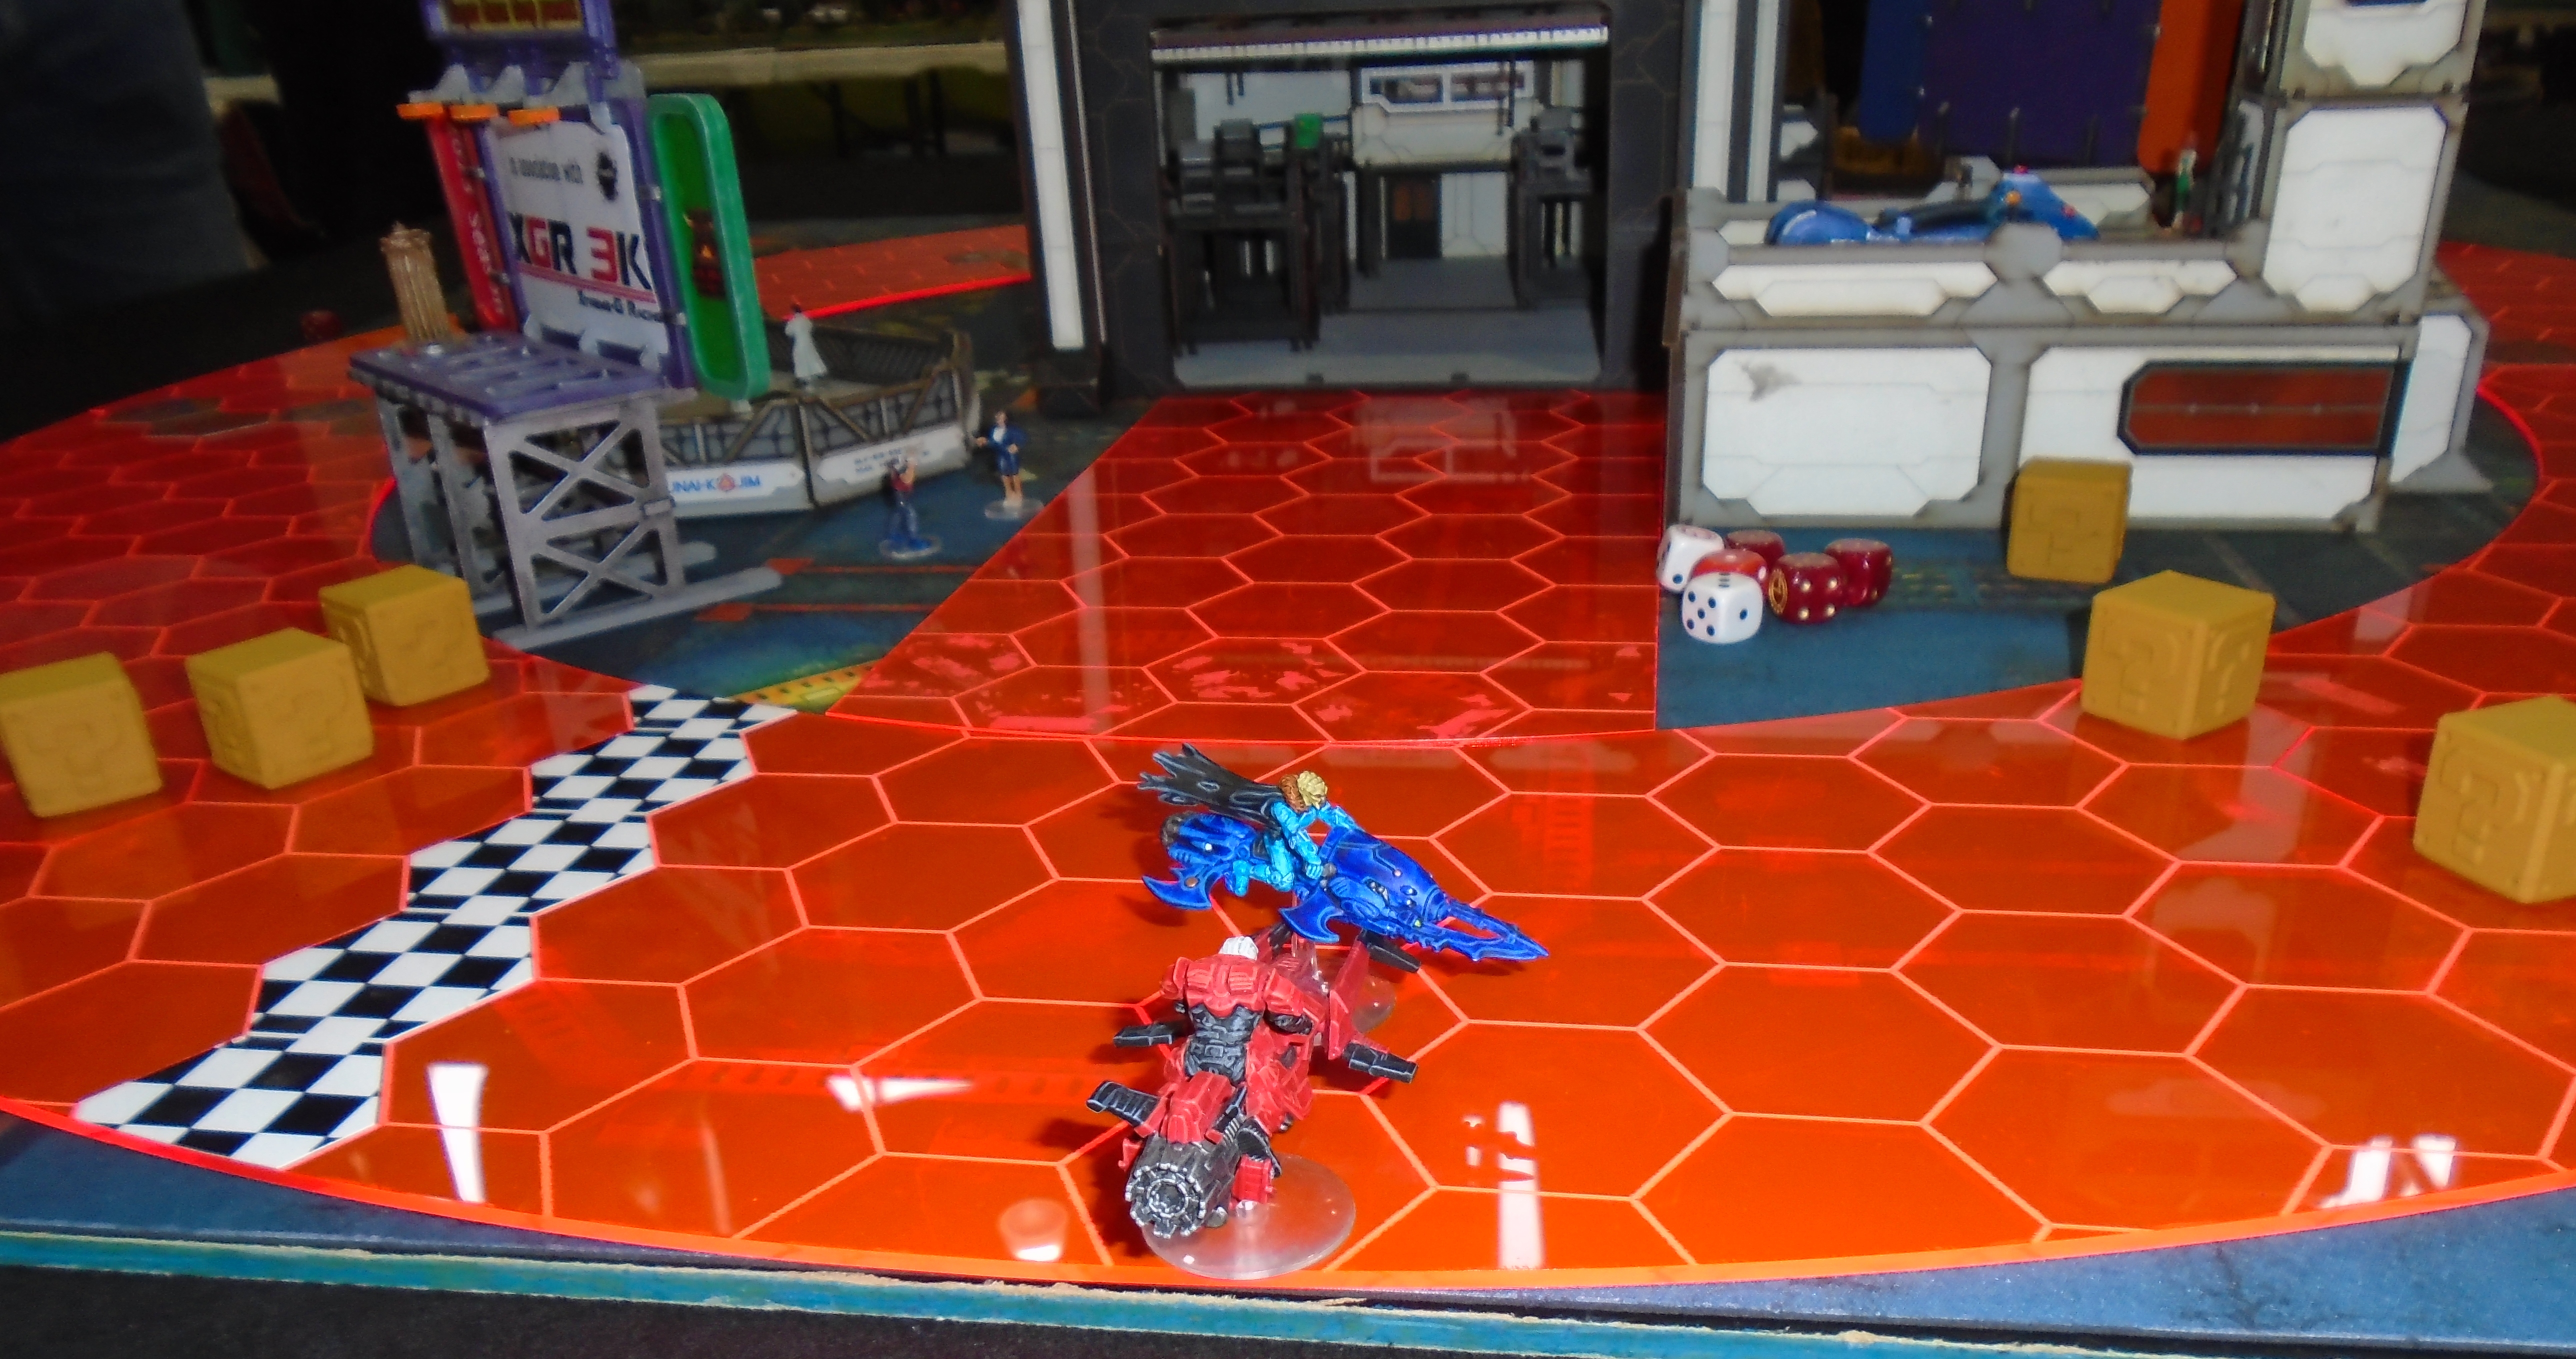
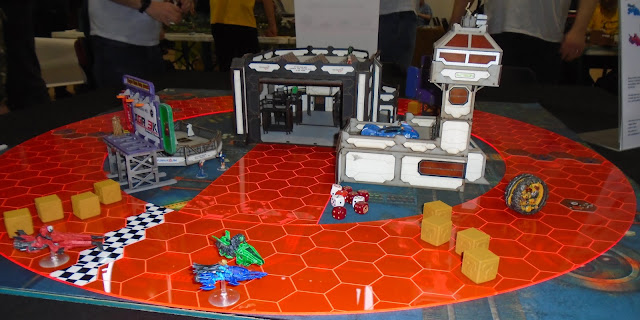
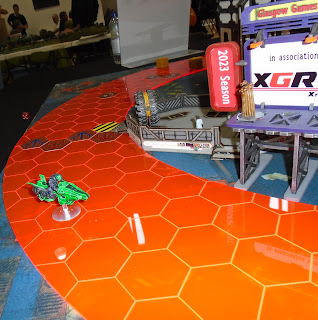
Game 1: Xtreme G Racing (Glasgow Games Group)
Glasgow Games Group put on a home brew sci-fi racing game involving various jet bikes. Apparently, the main design principle was to make a miniature game which felt somewhat like playing Mario Kart.
I'm not really able to judge how well that objective may have been achieved (I've heard of the console game, but I've never played it). However, the Xtreme G Racing game was a good game in itself, with simple rules that still managed to offer tactical choices to the players. Silly but fun!
So, here's how our race went:
 |
| I didn't have a jet bike, but rather drove a yellow mono-wheel. They all have the same abilities anyway... |
 |
| After the first lap (of two), I was well in the lead 😀 |
 |
| ...but when the leaders crossed the finish line (a tie between blue and red), I was nowhere to be seen. What happened? |
 |
| There was a massive pile up on the last lap; most of us were thoroughly caught up in it. I misjudged the distance remaining and thought I had time to go into the pits. This was a big mistake and I came in a distant last 😖. Oh, well... |
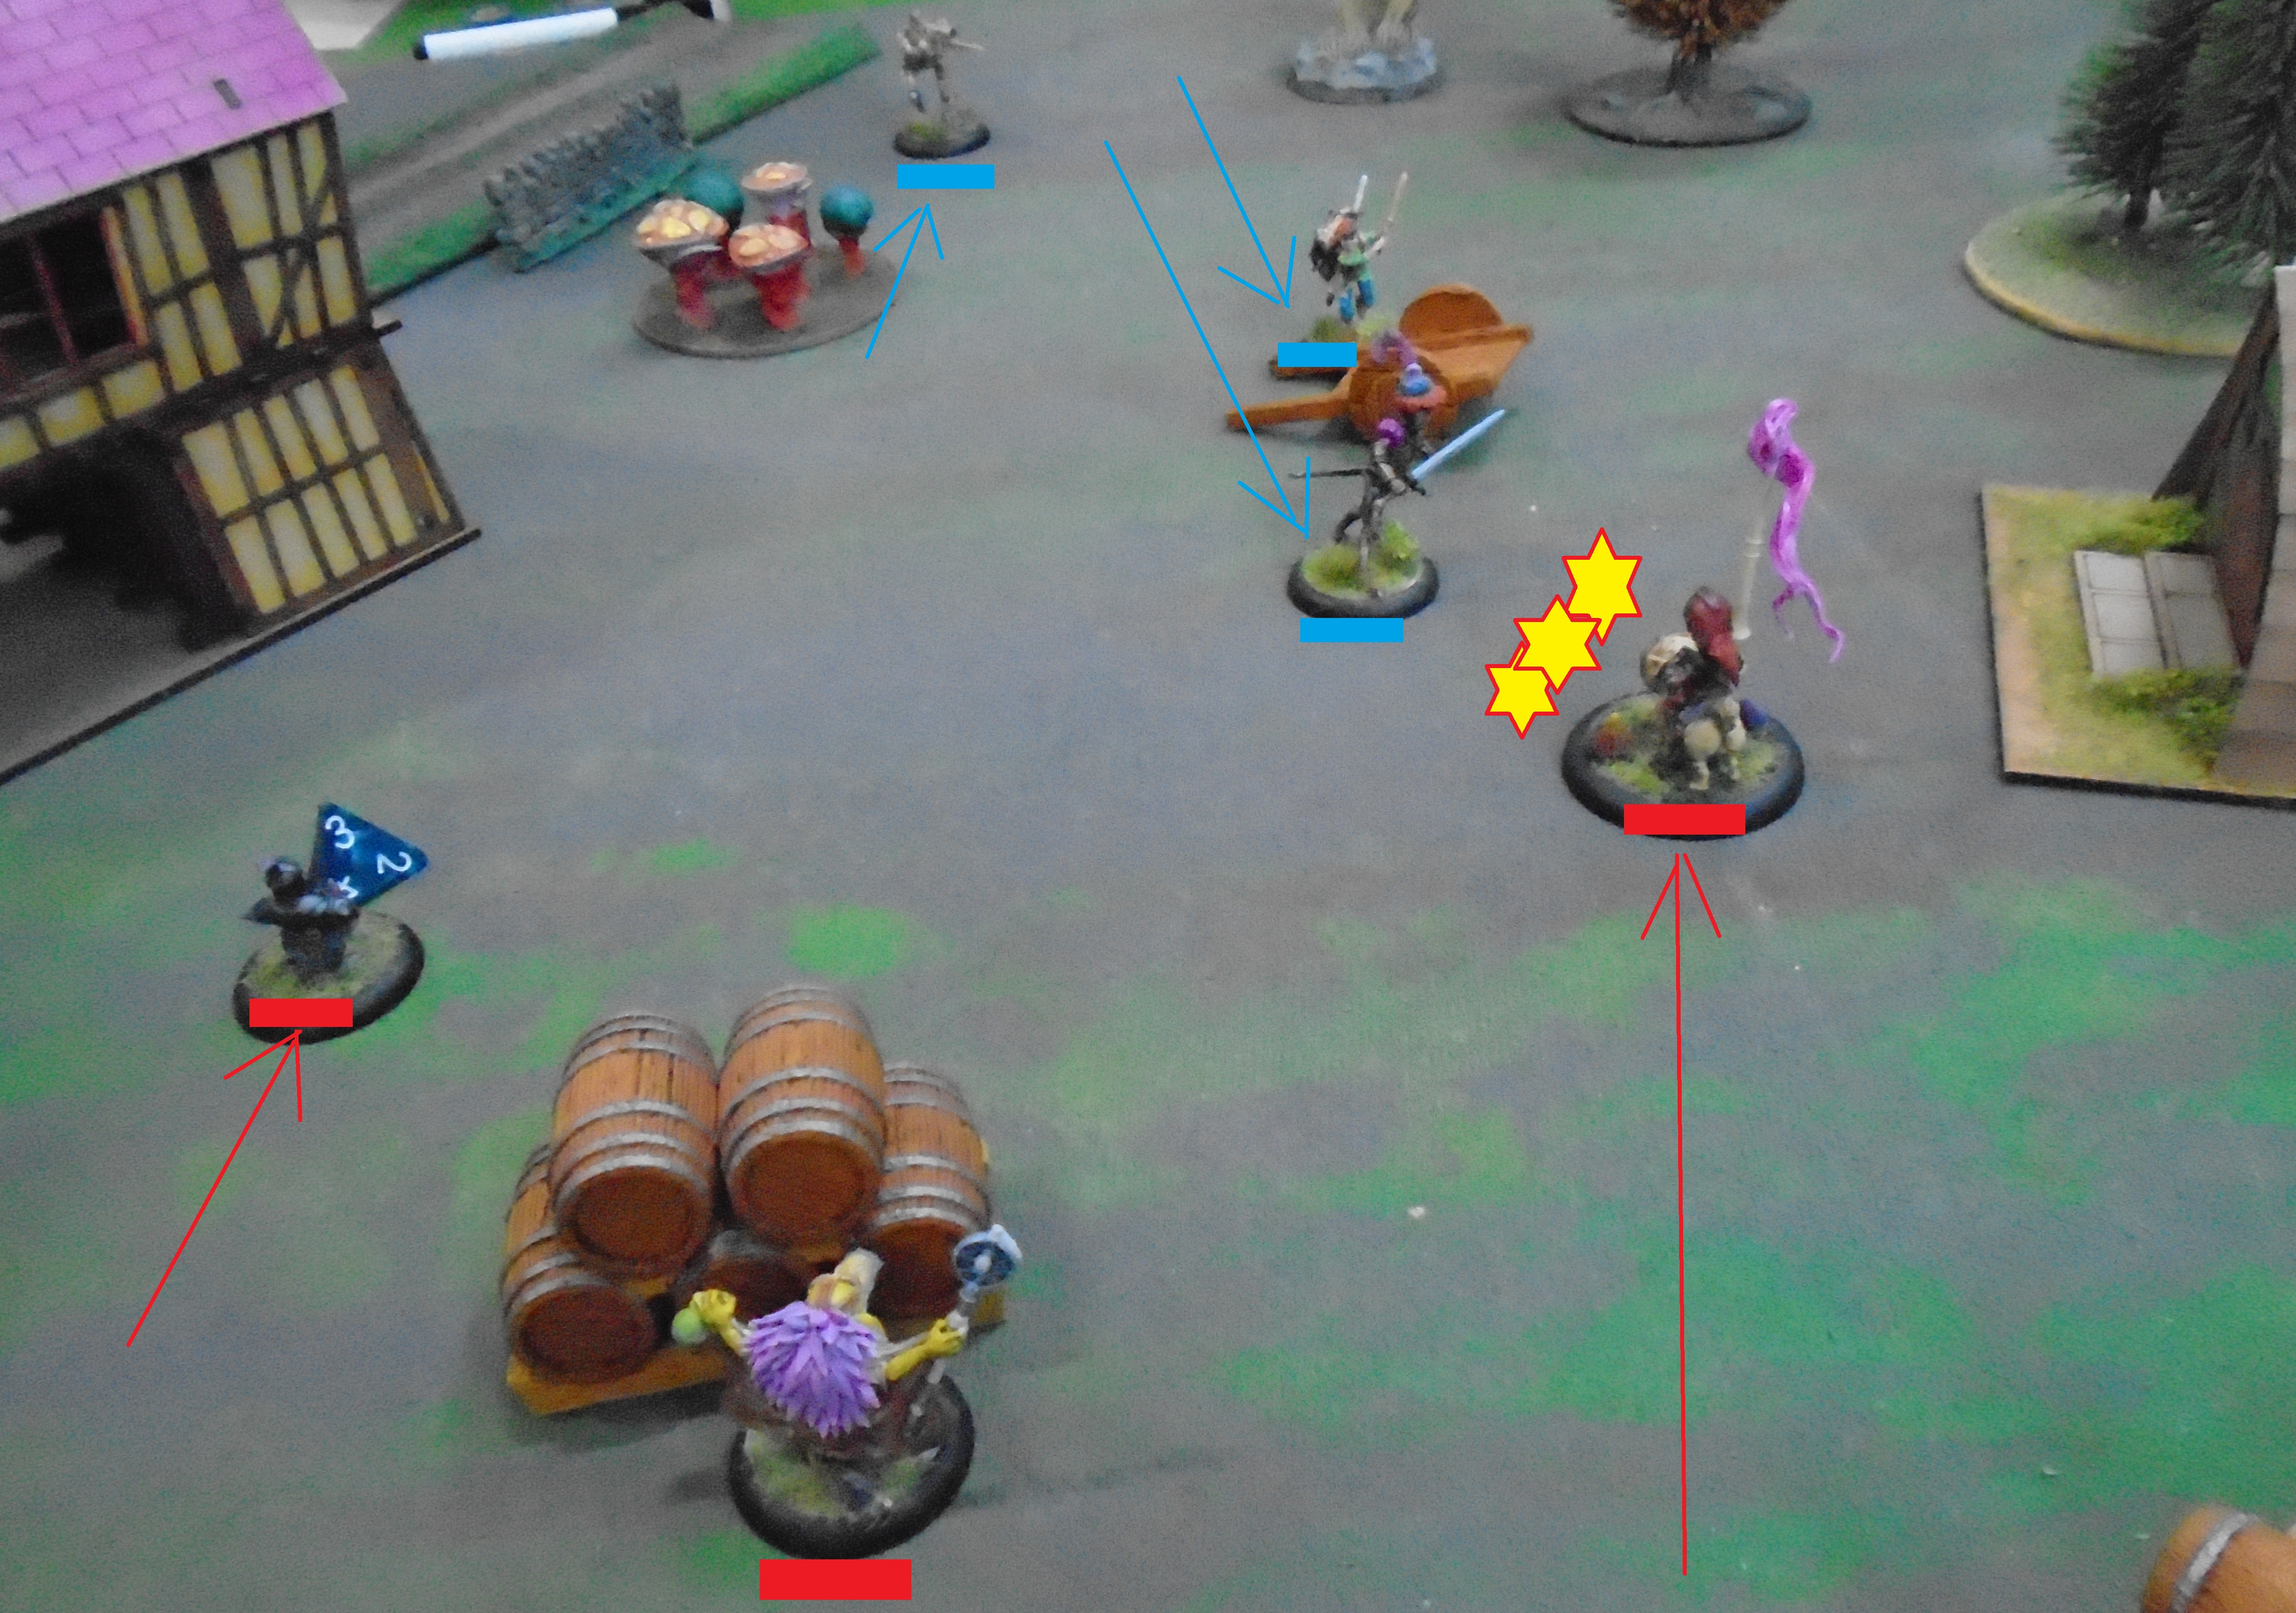
Game 2: Moonstone
Now this is something unusual! I thought I knew a bit about gaming and had at least heard about most games. However, Moonstone has passed me by - until now.
So, it's a "whimsical fantasy" skirmish game. Bands of creatures (goblins, humans, gnomes, other...) search for buried treasure (moonstones) and have to finish before dawn (i.e. there's a time limit). The models are definitely whimsical, the abilities are interesting and the combat system is done via cards that depict fencing moves. So far, so good.
Here's what happened in our game:
- A's (human) sniper tried to shoot at me. He misjudged badly and his musket blew up. Injured, he decided to retreat.
- One of my characters ("Grubb"? Not pictured) found and dug up a shallow moonstone. He then ran off the board with it, thus securing me one victory point.
- My goblin-mounted-on-a-pug found two moonstones that were fairly well buried. However, it turns out that the dog was an enthusiastic digger, so I retrieved both items quite easily.
- However, A's knight ("Baron something von Fancyhat") saw this and decided that stealing my finds would be easier than discovering his own. My pug+goblin was no match for this human in a fight and was slaughtered.
- In revenge, my vicious midget then appeared out of nowhere and did some real damage to the Baron with his signature attack (hint: it involves stabbing upwards). This left the Baron barely alive - but he counter-attacked and obliterated my little creature. At this point I was beginning to really dislike the man...
- In an ignominious move, my beaky goblin wizard approached Baron von Fancyhat and slew him with a noxious fart (yes, you read that right! Whimsical fantasy? You decide...).
- This last goblin then grabbed one of the dropped moonstones and legged it before daybreak.
Final score: 2 moonstones to the goblins, 1 to the humans (I can't remember which human character had picked this up). This was definitely a most interesting and unusual game, both for the subject matter and also for some of the game mechanisms.
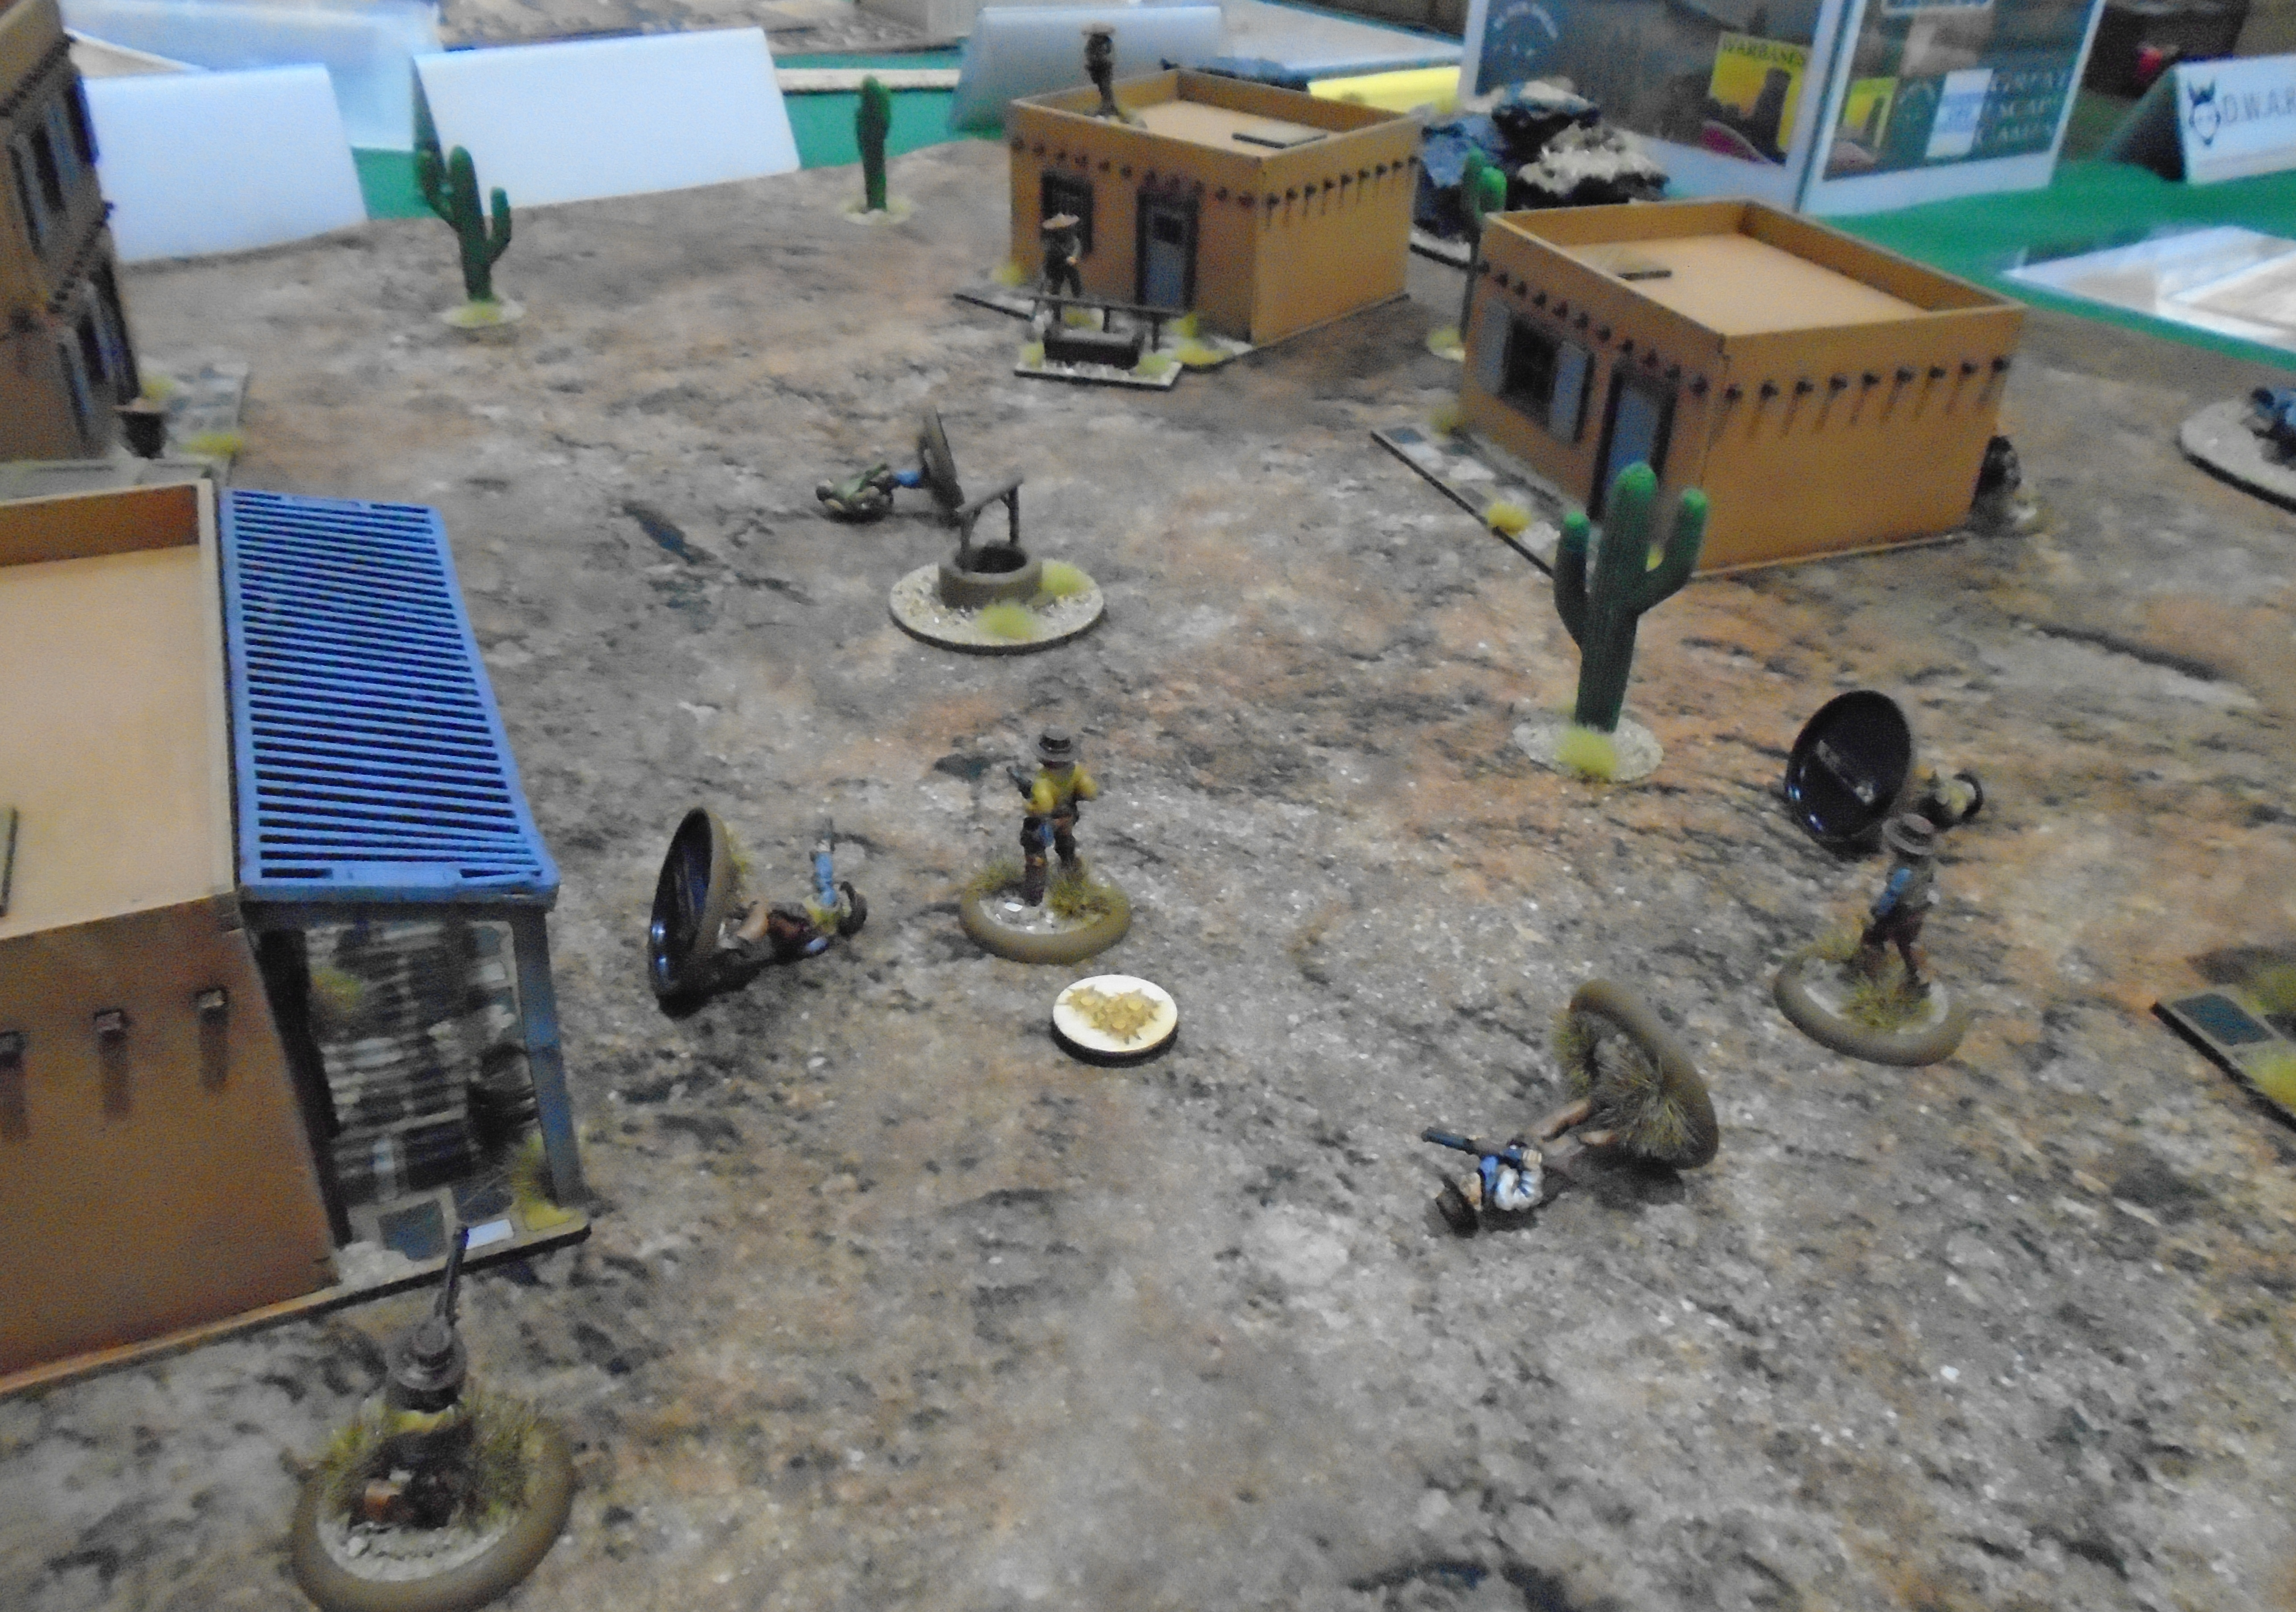
Game 3: 02:00
Now here's a game that seems to be everywhere at the moment! 02:00 is a game pitting British commandos against German garrisons in night-time raids (I imagine that other forces can be used as well). As such, it places a high emphasis on stealth and spotting; I was very curious to see what mechanisms were used for these aspects and how well they worked.
In our game, a small band of British special forces had to cross the board and escape off the other side. We would win if at least two of our men achieved this. That didn't sound too hard!
To this end, we crept along the hedgerows, ignoring the sleepy cattle.
However, I hadn't reckoned with the German officer. He was a bit keen, to put it mildly! This jackbooted thug personally spotted and shot 3 of my 4 troopers - my last squaddie was traumatised to the point where he couldn't resist a sentry and was (probably) taken prisoner.
In this last picture, you can just see my British officer running off the board (top left), fully expecting that his men were right behind him! At least he escaped, though to be honest I think he deserved to be cashiered for his exceptionally poor leadership.
What of the rules, then? Well, although the game looked fantastic, the assistant on my side of the table wasn't really comfortable or familiar with them. The game host (on the other side of the table) was hoarse from having talked most of the game - and was overloaded with questions from both sides and from passers by. Overall, I came away feeling that I still don't really know how the rules work. A missed opportunity?
Game 4: Dead Man's Hand
Dead Man's Hand is a set of rules that seems to be very popular, possibly even to the point of dominating the "Old West" style of games. Since I play such games myself - if only occasionally - I was interested to see what this rule set could offer.
As might be expected from the name, playing cards are an integral part of the game. In this case, these serve two functions: determining the order in which models activate and also providing a hand of "event" cards that each player can use at an appropriate moment.
Here's the game we played:
I took a large group of desperadoes (Mexican bandit types), whilst my son commanded a similar number of outlaws or cowboys.
My leader was cut down (almost my only casualty), but in return my desperadoes incapacitated over half of the opposition in only two or three turns. At that point, the enemy leader rolled really low on a nerve test and all his remaining figures ran away.
My thoughts on this game: the figures and scenery were perfectly good and set the scene nicely. I'm not so sure about the rules, though:
- The cards used for activation order were almost entirely random, so there wasn't much decision-making around them (unlike, for example, the way that cards are used in A Fistful of Lead).
- The "event cards" didn't make much difference. Maybe that was because we were unfamiliar with them (the text was very small and quite dense) and we didn't use many.
- I'm really not that keen on shots essentially taking "hit points" off models. A single shot does (usually) 1 point or (occasionally) 2 points. For reference, an average gunman can take 4 hits; a leader can take 5. So it's not possible to kill an opponent with a single shot.
This seems so odd that I'm wondering if I've understood the rules at all.
In summary, I was left cold by the game we played. Is this because we didn't really understand the rules? Or is it because Dead Man's Hand just isn't my kind of game? Perhaps this was another missed opportunity to learn about a set of rules which sound very interesting.
Loot
Yes, there was some shopping - both small pre-orders and some impulse buying. Here goes:
In no particular order:
- Dodos. Just because.
- Centaurs - more Greek Myth classics.
- Japanese cart crew, to flesh out my "samurai" village scenes.
- What a Tanker - seems like a fun set of rules and I wanted to take a proper look.
- Sarissa's "Guide to Laser Cut MDF Kits". Should be an interesting read.
- An Old West building. Actually I wanted the saloon, but Warbases didn't have the extra floors (with balcony) at the show - so I treated myself to a different model instead.
- Dice, paint brushes, bases.
Summary
This was a really good day. The weather was nice for walking to the venue, the traders had (mostly) what I wanted and there were plenty of participation games (too many for us to play in all of them!). I'm not sure what else I could have wanted!